Yazoo Tour 3/17/2007

Posted on 7:23 PM, under

A few members from our brew club went on a tour of the Yazoo brewery in Nashville this St. Patty's Day. Here's a few pics.


Click here for big pic


Click here for big pic


Click here for big pic


Click here for big pic


Click here for big pic


Click here for big pic


Click here for big pic


Click here for big pic


Click here for big pic


Click here for big pic


Click here for big pic


Click here for big pic


Click here for big pic


Click here for big pic


Click here for big pic


Click here for big pic

| edit post

1st Award Winning Brew

Posted on 6:21 PM, under

I just got the results back from the Great Arizona Homebrew Competition. I entered my California Common and my American Brown Ale. I was expecting my Brown Ale to do pretty good and I entered the CC to get feedback. Well, turns out I won a bronze for the CC and honorable mention for the Brown Ale.

Scores were:
California Common: 31.3 (Bronze)
American Brown Ale: 32.0 (Silver scored a 33)

I'm probably going to brew the Brown Ale again to see if I can score higher next time. This is the second comp it's been in and both times it's scored in the 32 range. So, I'll go over what all the judge's comments were and tweak the recipe a little and see if I can't get it up to "Gold Standard"

Cheers!
~MB

| edit post

Finally Kegging

Posted on 10:15 PM, under

Well, I should be fully kegging by this weekend. A friend and fellow homebrewer called while I was at work today and said he was going to All Seasons in Nashville and wanted to know if I needed anything. Not wanting to pass up a chance to buy more homebrewing "schwag", I asked him to pick me up a CO2 regulator, some beverage hose and some cobra/party faucets. All I need now is to pick up some gas line from Lowes and I'll be all set.

After working some more on my fermentation box I decided to clean and sanitize my (currently) one and only cornie keg. I filled it up with cleaner and sloshed it around a little. Then I attached the ball lock quick disconnects to the keg and hooked up my air pump that I use to aerate my wort and ran the cleaner thru the system. I then repeated the same with some Star San. After that I racked over my Belgian Pale Ale and sealed it up. Can't wait to pour me a glass from my very own kegging system.

Cheers!

| edit post

New Equipment: Fermentation Box

Posted on 3:30 PM, under


I'm about to finish up on building my Fermentation Box. This will allow me to lock in a fermentation temperature that is ideal for fermenting a certain type of beer. It seems that the average temp for most Ales is 68f so that will be what I'll set it at initially. I think I can get two or three buckets and/or carboys inside the box so I'll have to make sure I get some that have similar "Ideal" temperatures.

Several of the comps I've entered the judges have said something about fruity esters in my beers. That can come from higher than ideal temps or temps going up and down during fermentations. Hopefully that will be a thing of the past now with this new toy.

The box is made from an old crate that contained an IBM server cabinet (that's why it's base is a pallet). It's insulated with two layers of 1" thick foam insulating boards. The door was a spare cabinet door that the previous owners of our house had left over after apparently redoing the kitchen.

I have a smaller door that I may add to the left side later on. I found out that the door is the perfect size for access to a corny keg. I may also divide the box inside so I can have a small section at a much lower temp (~35f) to serve the purpose of a place to store cornies used as bright tanks.

The temp in the basement while I was working on this was 41f after closing it all up and putting a small lamp with a 60 watt bulb inside the temp was up to 59f in a matter of about 10 minutes.

It's currently at 64f. I'd call that a success...

| edit post

How I Brew: My Brew day in Pictures

Posted on 6:16 PM, under

As per my flow chart, here are the steps in my brew process with pics:

1.) Enter Recipe in to ProMash

I have my brew house computer and my main computer on a network so that when I come up with a recipe or session and save it I can pull it up on the brew house computer.


Click here for larger Pic

2.) Bring 1 Gallon of water to boil. Add to mash tun to adjust thermal mass

I boiled one gallon of water in my HLT and ran that into the mash tun. I figure in my HLT deadspace by running water into the HLT while the valve is open. Once water begins to run out (into a container of course) I let it run until it stops. From that point on I have basically set my deadspace to 0.


Click here for larger Pic

3.) Weigh out Hops and Grain.

I would normally weigh out my grains on the scale pictured below. However this time I bought my grains at All Seasons and when I gave the lady my recipe she put them all in one bag.


Click here for larger Pic


Click here for larger Pic


Click here for larger Pic

4.) Divide Hop additions into different bags.

I just use small snack bags to divide each addition. Then lable with type, order and time.


Click here for larger Pic

5.) Take temperature of unmilled grains.

Decided once I put my flowchart to use that this step is pointless as long as you take the temp after milling.

6.) Have ProMash calculate strike water amount and temp.


7.) Add strike water to HLT and begin heating.

I have a large dowel with markings on one side for my HLT and on the other for my Boil Kettle giving the gallon amount. (They are different since my HLT has deadspace)


Click here for larger Pic

8.) While strike water is heating mill grains.

I've got a Corona type mill that has been adjusted so that it mills/cracks and not grinds the grains into flour. I attached some air duct parts to fashion a ~5lb hopper. Then I attached a drill to the mill so I didn't wear out my arm. Sice this thing wasn't built to run that fast it will throw grains everywhere. To solve this I put a large bag over the milling plates and down into the shoot below (which is made from another duct piece). All the grains fall into a small (new) trash can sitting below.


Click here for larger Pic


Click here for larger Pic


Click here for larger Pic


Click here for larger Pic

9.) Prepare 5.2 and Irish Moss bottles

I just use some small water bottles, ~3/4 of the way with hot water.


Click here for larger Pic

10.) Verify no temp change in grains (*Change this to, Take temp of milled grains*)

Sorry, I never could get a good pic of the temp. I'm glad I took the temperature though. My grains were 51f, way lower than I had expected. Luckily I had my brew house computer handy to adjust my strike water temp.


Click here for larger Pic

11.) When strike water is at temp, dump mash tun pre heat water

Didn't think you guys needed a pic of me pouring out water...

12.) Add milled grains to mash tun.

Again... no pic.

13.) Add strike water and 5.2 to grains while stiring to break up any dough balls and ensuring there are no dry spots.


Click here for larger Pic

14.) Take mash temp reading.

Right on the money.


Click here for larger Pic

15.) Temp correct? Adjust if needed.

I hit it right on first try so I didn't need to adjust. I did swing by Wally World and pick up a small camp stove to have some boiling water ready just in case. Since it was still kinda cool out, and my tap water was cold my plan was to use that if I over shot my mash temp.


Click here for larger Pic

15b.) Didn't want to waste all that boiling water so...

Just a little pick-me-up.


Click here for larger Pic

16.) Close mash tun & note time mash started.

17.) Have ProMash calculate sparge water amount and temp.

This should really not say "...and temp", I always sparge with 170f water


18.) Begin heating sparge water to desired temp


Click here for larger Pic

19.) After grains have mashed 1 hr, begin draining wort sowly into 1/2 gallon pitcher until clear.


Click here for larger Pic

20.) Once wort runs clear, drain into boil kettle & recirculate the runnings /w debris.


Click here for larger Pic

21.) Once all wort has run into boil kettle begin adding sparge water (if to temp) to the mash. Stirring as before.


Click here for larger Pic

22.)Let sparge sit for 15 - 20 mins to allow grains to settle.

...no pic.

23.) After grain bed has settled begin draining wort to boil kettle as before.

Roughly 6.5 gallons to start with.


Click here for larger Pic

24.) Once all wort has drained to boil kettle take a sample for pre-boil gravity.

I Just used a Pyrex measuring cup and scooped out some to set aside to cool so I could take a reading.

25.) Begin boil, once wort begins a rolling boil add hop additions per recipe.


Click here for larger Pic

26.) Add Irish Moss and IM Chiller at last 15 mins of boil.


Click here for larger Pic

27.) At the end of the boil, kill burner and start chiller water.

I ran the waste water back into the sink and watched the temp of the water to make sure I was getting a good heat transfer.


Click here for larger Pic

28.) Once wort has reached pitching temps (<80f) transfer to fermenter.

Didn't take a pic while I was doing this (hands were a little tied up) but all I do is pour the wort thru two strainers into the fermenter.


Click here for larger Pic

29.) Aerate the wort

This is my current aeration system. Next time it will be an O2 tank. I just forgot to pick one up before starting.


Click here for larger Pic

30.) Pitch Yeast

31.) Seal up the fermenter

Didn't have any plastic ones clean, so I had to use a carboy this time.


Click here for larger Pic

32.) Insert air lock

33.) Move fermenter to where ever it will be during fermentation.

That's it, my brew day in pictures....


Here's a few misc pics I took:

Water filter used for RVs. $16 at Wal-Mart


Click here for larger Pic

Ball Valve on my mash tun. I had an issue with the hose kinking up since I didn't have a 90 degree barb so my friend and fellow homebrewer Rich came up with the idea of bending an old clothes hanger around it. Works like a charm!


Click here for larger Pic

This is the Stainless Steel braided hose inside my mash tun.


Click here for larger Pic

And of course, had to keep my check list handy...


Click here for larger Pic
_________________
"A mash ratio of about 1.5 quarts of water per pound grain, pH of 5.3, temperature of 150-155° F and a time of about one hour. These conditions yield a wort with a nice maltiness and good fermentability." ~John Palmer


| edit post

More Brewery equipment.

Posted on 7:12 PM, under

Decided to put a little blurb on some additions I've added to my brewery in the last few months. First off, I am now able to mill my own grains. This allows me to use the freshest grains possible in each of my brews since the milling takes place in a matter of minutes before I start my mash. I went the cheap route and picked up a Corona style mill off of ebay for around $25. It took a little tweaking to get the plates spaced apart to the correct gap so that I mill/crack and not grind my grains into flour. I also added one of those pieces of duct that attach to a floor vent for your central heating and air systems. This allows me to mill up to about 5lbs at a time. Then I removed the hand crank and attached a drill directly into the mill. I'm actually milling at a higher speed than I should since I have no way of slowing down the drill, but it seems to be working fine. In the future I'd like to get a 1/2 or 1/3 HP motor geared down so that I will get 175 to 200 rpms. This would allow me to dump in 5lbs and walk away or do something else. As it it now I have to hold the drill, obviously.


I have also added a scale with a custom, one of a kind weighing contraption. Actually it's just a bucket cut almost in half, but it works! The scale will weigh up to 10lbs, but the bucket only holds about 5lbs before the grains start to spill out the front. And that's fine since the hopper on my mill only holds 5lbs.

As far as the scale goes I'm pretty happy with it. I may lower the table the mill is attached to and hang the scale directly above it so I can weigh the grains and then dump them direclty into the hopper.


*Sorry about the crappy pics. I'll replace with good ones once I have them.*

| edit post

Drinking the California Common

Posted on 8:05 PM, under


I just popped open the California Common I bottled last Saturday during the Strong Ale boil. It has only been carbonating for about five days now but I wanted to give it a try to see if it would be ready to take to the homebrew club meeting we're having Saturday. I opened it and poured it into my glass and to my pleasent surprise it is pretty well carbonated. I think it is pretty good. It has a sweet aroma, maybe floral which I think comes from the Northern Brewer hops, but to be honest it smells a little more like a malt sweetness. So, I'm unsure of the aroma as of now. It's fairly clear as you can see by the picture. The head was white and didn't stay around long. Not much lacing of the glass. I think this will make a pretty good session beer. Especially at only 4.55% ABV. One issue with this is the fact that there are so few commercial examples of the style it's hard to tell if I'm on the money with this one. I have a few Anchor Steam Beers in my fridge and they're ok, not my favorite. They don't taste much like this beer though, so I'm wondering if this is on the mark when it comes to style. I'll probably send this one off to the next competition when I enter one so we'll see what some BJCP judges have to say. The kit that I bought for this one from Northern Brewer came with 3 oz of NB hops. I ended up omiting 1oz of them because I was affraid it would be too hoppy. I think I'm glad I did now since the bitterness of this beer does seem to be inline with style, at least with the Anchor counterpart.

| edit post
I wrapped up brewing my strong ale this Saturday that I had to cut short earlier this week. I listened close while I was removing the bung to see what kind of sound it made. I'm pretty sure I heard the sound of air rushing INTO the carboy. This suggests that since I put hot wort into it then it cooled down and created a vacuum. If it had made he sound of air rushing OUT of the carboy there would have been some sort of bacterial or wild yeast at work in there. I'm hopeful that this beer will turn out good in the long run. This is one I'll be aging so if something did go wrong I'll have to wait a few months before I find out unless is obvious at the initial tasting. But from what I've heard strong beers are pretty bad when they first come out of fermentation.
Right now my plan is to bottle some and rack some into a 5L mini keg with some oak chips for a few months. I just need to find out how much oak I need to put in there so it doesn't over power the beer.

Also, since the strong ale was a 90 minute boil and the hop additions were at 90 and 30 mins I had an hour of down time that I decided to use to bottle my California Common. I have to say that was the first beer that I wanted to drink the enitre hyrometer sample from. Really looking forward to this one carbing up and being ready to drink.

| edit post

Batch #12 -Abandoned-

Posted on 5:28 PM, under

Well, I started my Strong Ale tonight and about half way thru the mash started feeling ill. I thought about it for a while a decided to take the run off of the mash and store it all in a 6.5 gallon carboy and stop the brew session right there. We'll see what happens to the wort I guess. I'm considering adding a campben tablet to it to sterilize the wort while it's sitting. It will probably be around 50f in the room it's in so it won't be cold enough to keep the nasties from getting to it.

We'll see what happens after I boil it up. I'll post results asap.

| edit post
I brewed a California Common this week (Tuesday, 12-26-2006) with ingredients I purchased from Northern Brewer (www.northernbrewer.com). I'm sure the ingredients are of high quality, but one of the issues I had was finding the information to setup a ProMash recipe. I ended up just guessing and adding ingredients that were similar and were already in the ProMash database. Below are my notes on the brew day. Not a bad brew day after it was all said and done. It was the first late afternoon brew I've ever done. I usually start around 9 or 10 in the morning mainly due to the mosquito factor here in the south. You're fine in the morning but after about 3pm they will eat you alive. Since it's officially winter here the "skeeters" are not an issue. It wasn't too cold either that day.

Brew Day Notes:
Grains milled @ 2:28pm
Water added to heat Mash Tun (1 Gallon) not boiling yet @ 2:28pm
Dough in water calculated to 2.92 Gallons at 167f 2:29pm
Water in Mash Tun boiling at 2:33pm
Ran water from HLT to MT to warm @ 2:34pm
Strike water heating up at 2:40pm
Strike water at 145f @ 3:00pm
Dough in @ 3:15pm, mash temp ~155f (digital thermometer said 150f, regular thermometer said 155f) I have reason to believe the digital is messed up, wire on probe has gotten wet before and it acts funny at times, will test later.
Prepared 4.38 gallons for sparge water 3:20pm
Forgot to add 5.2 mash stabilizer, added at 3:35pm
Sparge water at ~175f 4:14pm. Turning fire off HLT.
Vorlaf & First runnings begin at 4:16pm. Runnings clean from start, maybe first 1/2 cup w/ debris.
Wyeast smack pack not expanding much, smacked about an hour ago (forgot to log)
First runnings finished at 4:22pm
Started adding sparge water to MT 4:22pm
Sparge water added to MT 4:28pm (seemed like a lot of water, I think I've been doing two sparges in the past. We'll see if this makes any difference) Just over 1 gallon in boil kettle after first runnings.
Yeast pack still not expanding. 4:44pm
Began second runnings 4:45pm clean from start.
4:58 set boil kettle on burner, almost exactly 6 gallons in boil kettleBoil kettle @ 155f @ 5:07pm
Boil kettle only @ 165F at 5:16 so I turned up the burner a little.
Boil kettle @ 190f @ 5:25pm
Added 1/2 oz of NB hops 5:30pm
Added 2nd 1/2 oz of NB hops at 6:00pm
Boil kettle at 5 1/2 gallons 6:09pm
Added Irish Moss @ 6:12pm
Added IM chiller to boil kettle @ 6:13pm
Added 1oz of NB hops @ 6:28
Killed heat to boil kettle @ 6:29
Started IM chiller water @ 6:30
175f @ 6:38pm
150f @ 6:40pm
125f @ 6:48pm
110f @ 6:58pm
105f @ 7:03pm
100f @ 7:07pm
Poured wort into fermenter @ 7:10pm
Aerating wort @ 7:15pm
90f @ 7:18pm
Pitched yeast @ 80f @ 7:30pm
Sealed up fermenter and set in other room 7:31pm
Hydrometer sample says ~1.050
Clean up done @ 7:55pm
_____________________________________

I checked the fermenter yesterday and it was rocking. The temp in my fermentation room as been between 62f and 66f since this brew has been in there. I think it will be just fine, but we'll see in about another week.

Recipe used:
Northern Brewer California Common
A ProMash Recipe Report
Recipe Specifics
----------------
Batch Size (Gal): 5.00
Wort Size (Gal): 5.00
Total Grain (Lbs): 9.00
Anticipated OG: 1.048
Plato: 12.02
Anticipated SRM: 7.1
Anticipated IBU: 43.6
Brewhouse Efficiency: 75 %
Wort Boil Time: 60 Minutes
Grain/Extract/Sugar

% Amount Name Origin Potential SRM
-----------------------------------------------------------------------------
88.9 8.00 lbs. Pale Malt(2-row) America 1.036 2
11.1 1.00 lbs. Carastan Malt Great Britian 1.035 34

Potential represented as SG per pound per gallon.

Hops
Amount Name Form Alpha IBU Boil Time
-----------------------------------------------------------------------------
0.50 oz. Northern Brewer Pellet 9.60 23.6 60 min.
0.50 oz. Northern Brewer Pellet 9.60 12.1 30 min.
1.00 oz. Northern Brewer Pellet 9.60 7.9 1 min.

Yeast
-----
WYeast 2112 California Lager

| edit post

California Common

Posted on 5:54 PM, under

Well, next up I've decided to do a California Common beer which is an Ale/Lager hybrid. Which basically means it is a lager that is fermented in the lower temp levels of an ale. This beer will be fermented at about 60f - 65f since that is about the range my basement is holding at right now. This will be the first lager I've attempted. I'm trying to get several different brews on hand so I'll be ready for 2007 competitions.

Here is the BJCP info on this beer. All can be found here. I'm having a little issue finding the stats for some of the ingredients so I can setup a ProMash recipe. If I do I'll post it here so anyone else who needs it can find it.

7B. California Common Beer

Aroma:
Typically showcases the signature Northern Brewer hops (with woody, rustic or minty qualities) in moderate to high strength. Light fruitiness acceptable. Low to moderate caramel and/or toasty malt aromatics support the hops. No diacetyl.

Appearance:
Medium amber to light copper color. Generally clear. Moderate off-white head with good retention.

Flavor:
Moderately malty with a pronounced hop bitterness. The malt character is usually toasty (not roasted) and caramelly. Low to moderately high hop flavor, usually showing Northern Brewer qualities (woody, rustic, minty). Finish fairly dry and crisp, with a lingering hop bitterness and a firm, grainy malt flavor. Light fruity esters are acceptable, but otherwise clean. No diacetyl.

Mouthfeel:
Medium-bodied. Medium to medium-high carbonation.
Overall Impression: A lightly fruity beer with firm, grainy maltiness, interesting toasty and caramel flavors, and showcasing the signature Northern Brewer varietal hop character.

History:
American West Coast original. Large shallow open fermenters (coolships) were traditionally used to compensate for the absence of refrigeration and to take advantage of the cool ambient temperatures in the San Francisco Bay area. Fermented with a lager yeast, but one that was selected to thrive at the cool end of normal ale fermentation temperatures.

Comments:
This style is narrowly defined around the prototypical Anchor Steam example. Superficially similar to an American pale or amber ale, yet differs in that the hop flavor/aroma is woody/minty rather than citrusy, malt flavors are toasty and caramelly, the hopping is always assertive, and a warm-fermented lager yeast is used.

Ingredients:
Pale ale malt, American hops (usually Northern Brewer, rather than citrusy varieties), small amounts of toasted malt and/or crystal malts. Lager yeast, however some strains (often with the mention of "California" in the name) work better than others at the warmer fermentation temperatures (55 to 60°F) used. Note that some German yeast strains produce inappropriate sulfury character. Water should have relatively low sulfate and low to moderate carbonate levels.

Vital Statistics:
OG 1.048 - 1.054
FG 1.011 - 1.014
IBUs 30 - 45
SRM 10 - 14
ABV 4.5 - 5.5%

Commercial Examples:
Anchor Steam, Southampton West Coast Steam Beer, Old Dominion Victory Amber, Flying Dog Old Scratch Amber Lager

| edit post

I did my first cold weather brew last weekend and it brought about a few new challenges. First of all I'm not too good with cold weather. It's my firm belief that humans should hibernate all winter. I had to make sure I didn't get in too big of a hurry while I was doing something outside during the brew. Second of all, I could only get my mash up to 147f. I did get close to my target OG though. I think I was aiming for 1.049 and I hit 1.047. I didn't do a starter but one thing I did different with the yeast was, since it was so cold, I carried the vial around in my pocket during the entire brew session so the yeast would be awake and kicking when it came time to pitch. Fermentation started pretty slow, I think it was 24+ hours before I noticed it starting to bubble and that was after I moved it into a semi-heated room in the basement. The main basement was getting down to the low 50s, this room seems to stay in the low to mid 60s. We'll see how it comes out.

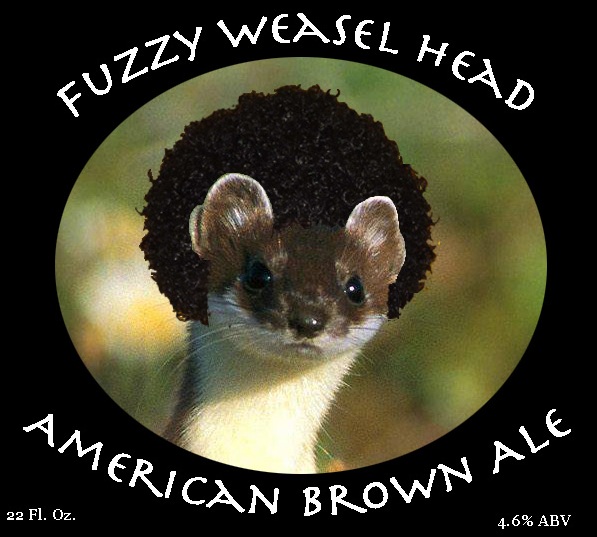
(By the way, the name Fuzzy Weasel Head comes from the acronym FWH which stands for First Wort Hopping. A method I used for this brew)

Fuzzy Weasel Head Brown Ale
BJCP Style and Style Guidelines
10-C American Ale, American Brown Ale

Grain:
8.50 lbs. Pale Malt(2-row)
1.00 lbs. Crystal 60L
0.50 lbs. Chocolate Malt

Hops
0.50 oz. Nugget Whole First WH
0.50 oz. Nugget Whole 60 min.
0.75 oz. Willamette Whole 30 min.
0.25 oz. Willamette Whole 15 min.

Extras
1.00 Tsp 5.2 added to Mash
1.00 Tsp Irish Moss 15 Min.(boil)

Yeast
White Labs WLP001 California Ale

| edit post

Specialty Grains

Posted on 12:28 PM, under

This is my current stock of specialty grains. It is mainly crystal malts with a few others like flaked barley and an aromatic malt. Some of these are odd malts, but most are ones I'll use fairly often. The two big jars are chocolate malt, that I didn't really need that much of but that was all the LHBS had when I needed some.


| edit post